
 Welcome back reader friends! I trust you’ve had a nice long holiday break, wherever in the world you are. We spent a wet week in Paris (more on that later), and now I’m dealing with a very particular toddler who has decided two naps per day is tooooo many. Oh, joy.
Luckily, the little stinker has found his happy place smashing up his Christmas present – a Lego Duplo table that Doc Sci and I made from an Ikea Expedit shelf.
I was inspired by the Lego Playhouse I saw here. However, I had a slightly different vision of what would work better for our family and apartment. I wanted the table to include space for storage, and I wanted it mobile.
I absolutely loved making this gift for the boys, and I know your kids would be thrilled to receive this, too. So, today I’m sharing how we did it.
Supplies:
- Ikea Expedit 4×4 shelving unit
- Ikea Expedit set of casters (2, optional, if you want the table mobile)
- Ikea Dröna boxes for storage
- Two large Lego Duplo building plates (bauplatte) for the top
- Four small Lego Duplo building plates for the middle shelf*
- Strong glue like E6000 or UHU Kontakt Kraftkleber
- Small Duplo bricks (2×2) in assorted colors (optional)
*The large Lego Duplo building plates are too big to fit on the lower shelves (but, they are perfectly sized for the top!).
We could’ve bought them anyway and cut them to fit, but I wanted a lower stress option (what if the cut looked bad? What about the rounded corners?). We found smaller boards on ebay (none available on amazon!). The size I used is 12×16 knobs as seen below.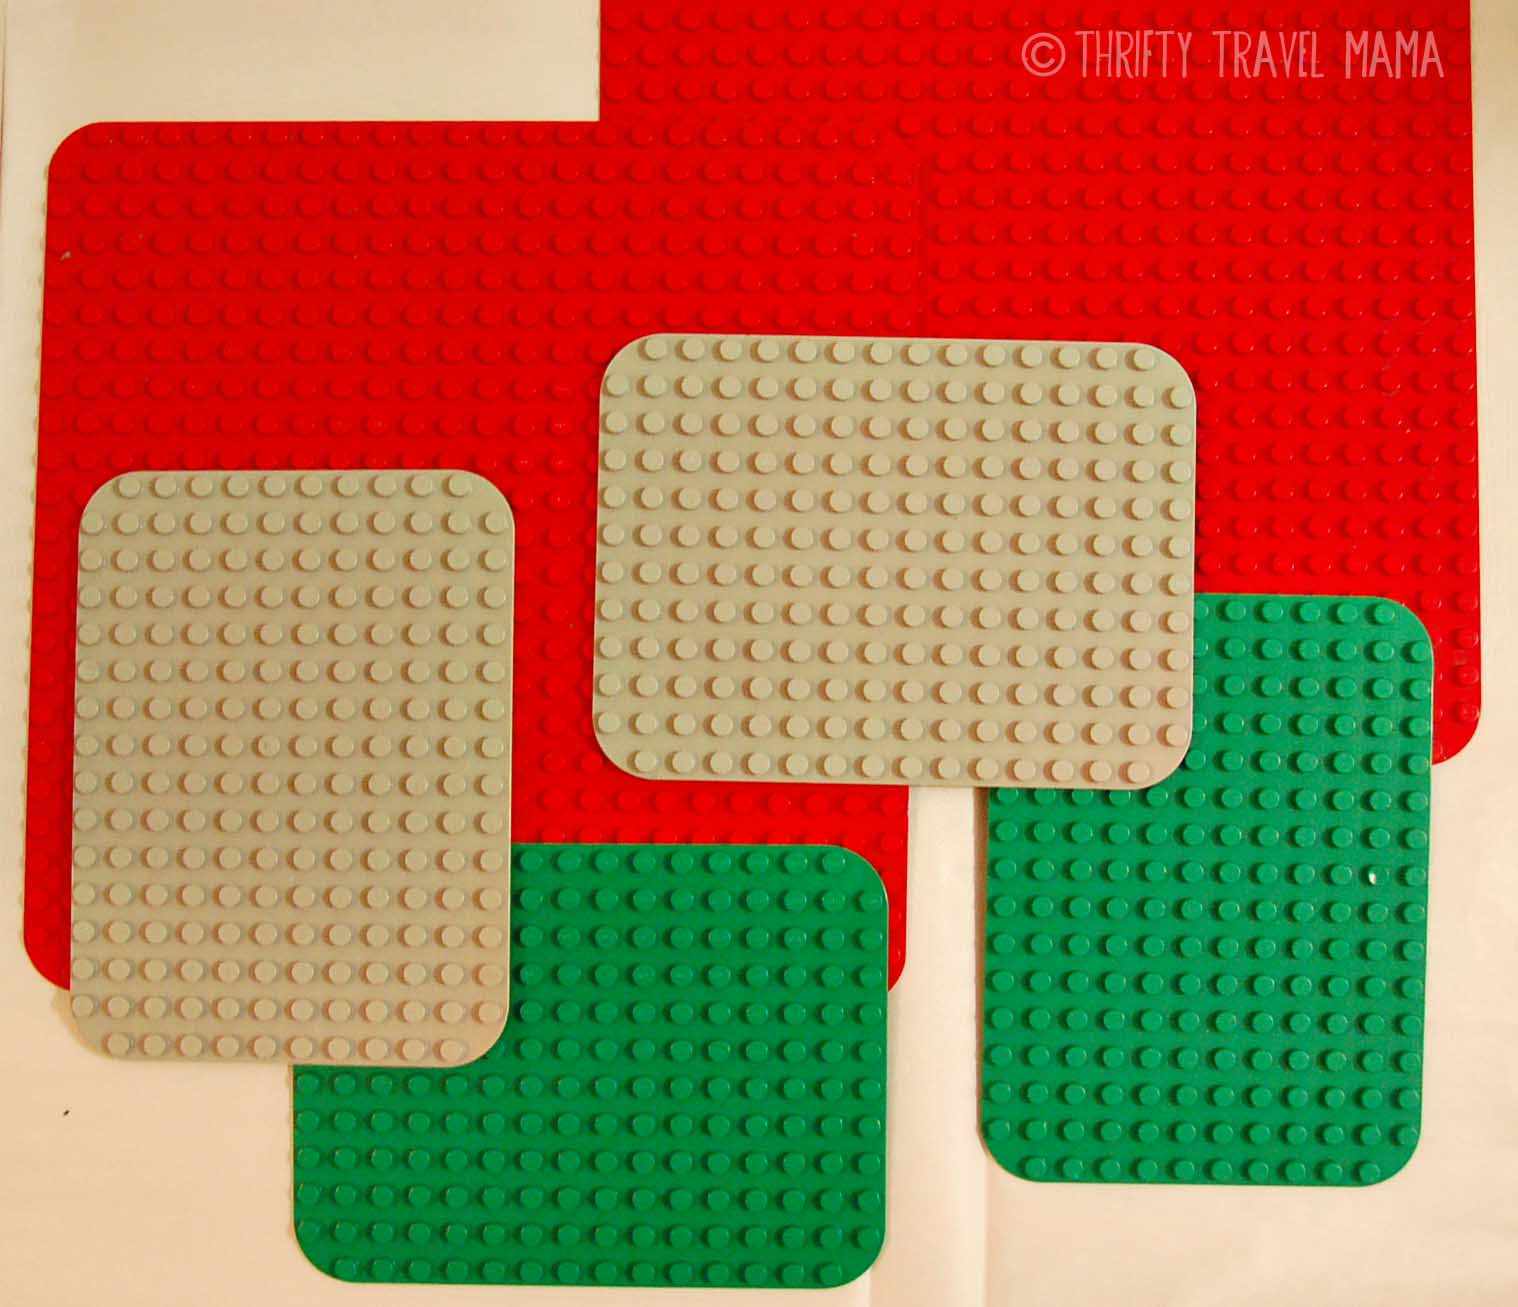 Actually, I bought all the Lego Duplo building plates on ebay. Those suckers are crazy expensive, and I knew my boys wouldn’t care if a few of the knobs showed a bit of wear and tear.
Assemble the Shelf
First things first – put your Ikea Expedit shelf together! I don’t think you need much help here – the shapeless nonverbal figures in the instructions should tell you everything you need to know.
Add the Wheels
Wheels are completely optional. I wanted them because we have a very small apartment, and Big Foot takes a 3-4 hour nap in the boys’ room. I thought it would be nice for the older boys to not have to carry out armfuls of toys to play with while the little one sleeps.  Just as a side note, it’s not necessary to use Ikea’s casters. If you find wheels that suit your fancy elsewhere, just use those.
Again, I was going for low stress. The wheels are competitively priced (at least in Germany), fit the Expedit shelf perfectly, and have a locking wheel which is crucial if you don’t want your playhouse running away from you.
A drill is handy to have when attaching the wheels, but it’s not critical. Doc Sci was too lazy to bring ours up from the cellar, so he used good old fashioned elbow grease.
Glue the Boards
Decide where you want to position the boards, and glue them down one by one. A few tips…
- If you bought used boards, clean them first before gluing! I totally forgot to do this (you can see it in the photo), and it was a pain in the you-know-what to scrub in between those little knobbies after they were cemented down.
- It’s helpful to have two people glue the boards simultaneously in case you need to shift them slightly to ensure proper spacing.
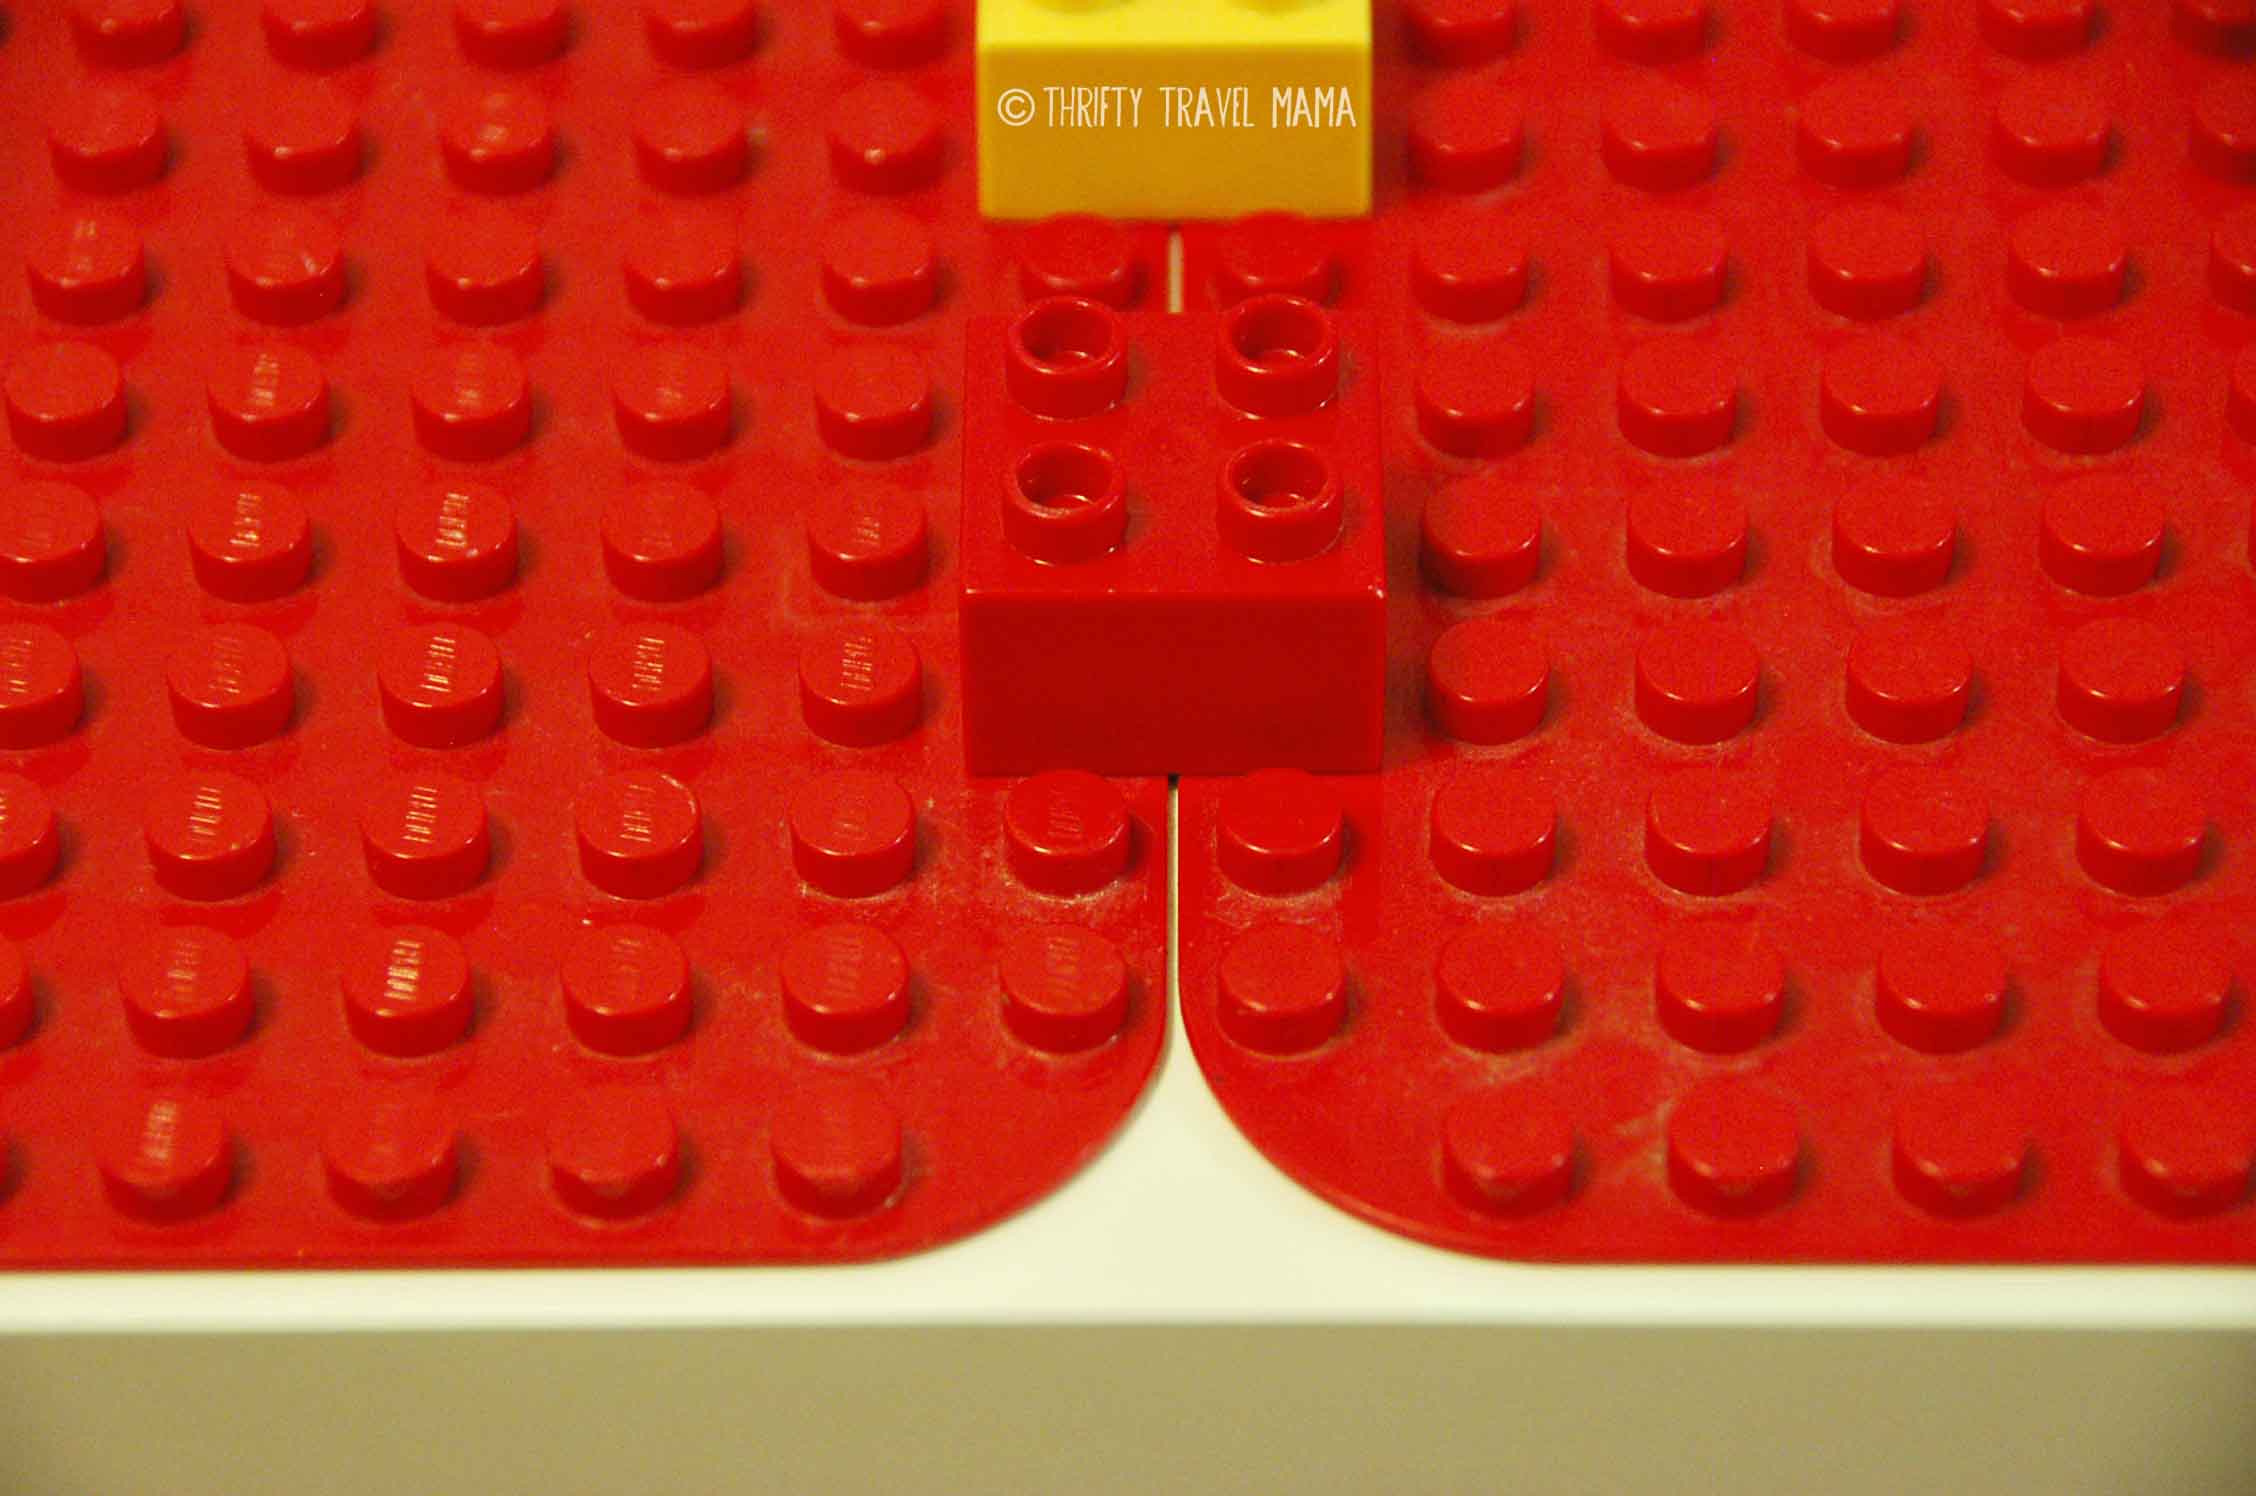
- Use Duplo bricks to attach adjacent boards together (see second photo below). This will ensure you get the spacing correct. If you glue the boards with the edges flush, they will be too close!
- Pile heavy books on the boards while the glue dries overnight. Keep the Duplo bricks in place during this time, too.

Add Storage and Decorate
Zip your bins together, and fill them with your bricks. I put a few extra of the bigger building plates in one of the bins so that play didn’t have to be confined to the table. They do fit, but only at an angle.
I attached some colorful 2×2 Duplo bricks around the edges for decoration and to encourage “out of the box” play.
I liked the idea of laminating paper scenes and placing them inside the middle shelf. However, I didn’t have time to do this, and I wanted to see how my boys would use the table first.
If I end up adding the pictures, I’ll use velcro tabs on the back of the laminated sheets so they can switch them out. I’m thinking they would love the ability to rotate between airport, fire station, police station, post office, zoo, construction zone, and city scenes.
I added some vehicles, buildings, and people (all from ebay, of course) to make the gift super sweet for them.
And… You’re Done
That’s it – easy peasy!
We gave the boys this table as a joint gift. We’re resisting the draw of the regular, smaller Legos as long as possible since Big Foot still puts everything in his mouth. My hope is that this table will help the Duplos remain cool just a bit longer. So far, so good!
Would your kids like this table? What other variations can you think of to customize it for your family?

You had me at Ikea Hack (not that I’m handy – but I like to watch people who are) and then when you said “lego” it was almost too much! I was just this afternoon putting “lego storage” on my shopping list for the month. I’m going to have a think about copying this (if I can work out where the bench would go when not in use).
Yay! I know there are other, smaller Ikea Lego hacks, but I don’t think many of them include storage. Let me know what you come up with 😉
I just did a tour of the kid’s room and my favourite is still “remove anything they haven’t played with in a while and use a newly-spare box”. But then that doesn’t have its own moveable workbench…
This is a neat and clever idea! When I first saw your picture, I was thinking if IKEA sells this. Now I know what you mean by HACK, haha.. It’s beautiful and I bet the kids love it!
Thanks, Christy!
That’s a good idea!
This is so fantastic. The boys are just getting into the whole lego thing as I recently talked about- and what a cool thing this would be for B’s birthday… hmmmmm. You’ve given me something to think about!
They would love it!